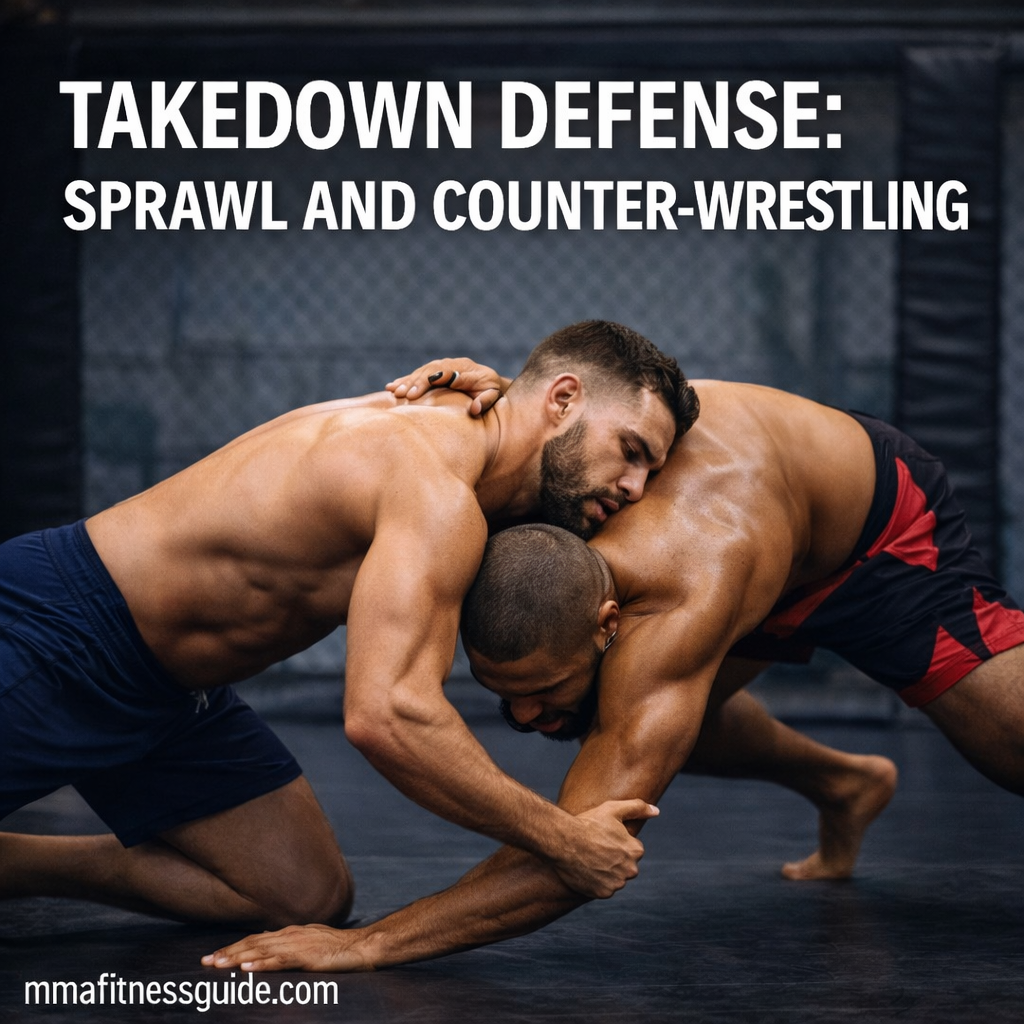
A fighter changes levels underneath a jab and drives toward the hips. The defender has only a brief window to react: move the legs out of reach, get the hips heavy, control the attacker’s head or upper body, and prevent the shot from turning into a finished takedown.
That sequence is the foundation of takedown defense.
In MMA, however, stopping the initial shot is only part of the exchange. The attacker may switch from a double leg to a single, drive toward the cage, climb into a body lock, or continue wrestling through several positions. The defender needs answers for those transitions as well.
The sprawl provides one of those answers against shots at the legs, while counter-wrestling covers the positions that follow—using underhooks, head control, whizzers, frames, front headlocks, angles, and cage movement to regain position or reverse the exchange.
Why Takedown Defense Matters in MMA
Every striking exchange can potentially transition into wrestling. A jab can disguise a level change, an overhand can lead into a double leg, and forward pressure can push a fighter toward the cage before a clinch entry.
Reliable takedown defense can help a fighter:
- Maintain a preferred fighting range
- Make wrestling entries more difficult
- Escape unfavorable clinch positions
- Create opportunities to counter after failed shots
- Strike with greater freedom without constantly overreacting to level changes
The goal isn’t necessarily to avoid every grappling exchange. It’s to make it difficult for the opponent to determine where those exchanges take place.
The Sprawl: A Fundamental Response to Leg Attacks
A sprawl is commonly used when an opponent attacks the legs with a shot such as a double leg.
Rather than trying to pull the opponent upward with the arms, the defender moves the legs away from the attack while bringing the hips down and applying pressure to compromise the shooter’s posture and forward drive.
What a Proper Sprawl Does
Depending on the position, an effective sprawl can:
- Move the hips and legs away from the attack
- Make it harder for the opponent to establish control around the legs
- Apply hip pressure to the attacker
- Disrupt posture and forward momentum
- Create opportunities for head and arm control
The exact position changes with the shot. MMA takedown defense is rarely as simple as dropping into one textbook sprawl and holding it.
Common Sprawl Mistakes
Several mistakes make it easier for an opponent to continue wrestling:
- Dropping straight down without moving the legs away
- Keeping the hips too high
- Reaching toward the opponent before establishing hip position
- Allowing the attacker to maintain strong posture
- Trying to stand immediately before clearing the opponent’s grips
- Treating the sprawl as the end of the exchange
Once the initial shot is stopped, the defender still needs to establish control, circle away, counter, or transition into another wrestling position.
Defending Different Takedown Entries
Not every takedown should be defended with the same response. Recognizing what the opponent is attacking helps determine which tools are appropriate.
Double-Leg Takedowns
Against a double leg, the defender generally wants to prevent the attacker from getting deep underneath the hips and connecting securely around the legs.
Useful defensive concepts include:
- Moving the hips away from the entry
- Establishing heavy hip pressure when appropriate
- Controlling or redirecting the attacker’s head
- Fighting grips
- Creating an angle rather than remaining directly in front
Earlier recognition usually gives the defender more options.
Single-Leg Takedowns
A single leg creates a different problem because the attacker may already have control of one leg.
Defense can involve:
- Fighting for head and hand position
- Using an overhook or whizzer when appropriate
- Applying downward pressure
- Turning the knee and hip into safer positions
- Maintaining balance while working to free the trapped leg
- Using the cage strategically when the exchange reaches the fence
Repeatedly hopping without improving position can allow the attacker to continue chaining attacks.
Body Locks and Clinch Takedowns
Some takedowns begin without a traditional shot.
An opponent may establish a body lock, underhook, or clinch position before attempting a trip, throw, or mat return.
Defensive priorities often shift toward:
- Fighting for underhooks
- Controlling head position
- Keeping the hips positioned appropriately
- Breaking or weakening grips
- Maintaining a stable base
- Preventing the opponent from getting behind the hips
This is why takedown defense needs to include clinch wrestling as well as sprawls.
Counter-Wrestling: What Happens After the Shot
Stopping the first entry creates a transition rather than an automatic reset.
A defender may be able to establish:
- A front headlock
- An underhook
- A whizzer
- Head-and-arm control
- A favorable angle
- A position from which to disengage
Counter-wrestling is the process of using those positions to prevent follow-up attacks and improve your own position.
Front Headlock Control
When a shot leaves the attacker’s head and posture compromised, the front headlock can become available.
From there, depending on skill level and ruleset, a fighter may work toward:
- Circling behind
- Snap-downs
- Knees where legal and appropriate
- Submission transitions
- Disengaging back to striking range
The position works best when control comes from posture and positioning rather than simply squeezing the opponent’s neck.
Whizzer and Overhook Defense
An overhook—often called a whizzer in wrestling contexts—is commonly used when defending certain single-leg and clinch positions.
Combined with hip position and head control, it can help prevent the attacker from gaining a stronger angle.
The whizzer is not a standalone solution. If the opponent controls the leg and wins the positional battle elsewhere, relying entirely on arm pressure may not be enough.
Using the Cage for Takedown Defense
The fence changes wrestling because the defender can no longer retreat indefinitely.
An attacker may use cage pressure to:
- Finish a double leg
- Transition to a single leg
- Establish a body lock
- Chain between takedown attempts
- Prevent the defender from circling away
Effective cage defense therefore requires more than a wide stance.
Important skills include:
- Fighting for underhooks
- Maintaining useful head position
- Framing when appropriate
- Preventing the opponent from controlling both hips
- Turning away from the fence when an opening appears
- Building back to a stable stance after being grounded
Cage wrestling should be practiced as its own skill rather than treated as ordinary wrestling next to a wall.
Sprawl-to-Offense Transitions
A defended shot can create offensive opportunities, but the priority is establishing control before attacking.
Possible transitions include:
- Sprawl → front headlock
- Sprawl → circle behind
- Sprawl → disengage and return to striking
- Sprawl → legal short strikes from a controlled position
- Single-leg defense → underhook → turn opponent toward the cage
Rushing to strike before the takedown threat is actually neutralized can give the attacker another opportunity to connect their hands and continue wrestling.
Conditioning for Takedown Defense
Technique determines how efficiently a fighter defends, but fatigue can make those positions harder to maintain.
Useful conditioning can include:
- Repeated technical sprawls
- Short wrestling intervals
- Clinch rounds
- Cage-wrestling rounds
- Scramble drills
- Strength work for the hips, legs, back, trunk, and grip
Conditioning should support wrestling practice rather than replace it. Performing hundreds of fast sprawls with deteriorating technique is less useful than practicing realistic defensive sequences with appropriate resistance.
Training Drills for Sprawl and Counter-Wrestling
Takedown defense develops best when drills gradually become less predictable.
Basic Sprawl Drills
Beginners can start with:
- Technical sprawls from fighting stance
- Partner level-change reactions
- Controlled double-leg entries
- Sprawl → establish control → reset
The emphasis should remain on positioning rather than simply performing the movement as quickly as possible.
Counter-Wrestling Drills
Once the initial mechanics are reliable, add follow-up positions:
- Sprawl → front headlock → circle
- Single-leg defense → whizzer → escape
- Double-leg defense → underhook → disengage
- Cage shot → defend → turn off the fence
- Defended shot → opponent switches attacks → continue defending
These drills teach an important MMA principle: the first defense may only stop the first attack.
Add Striking Reactions
Eventually, takedown defense needs to begin from realistic MMA situations.
For example:
- Partner jabs → changes levels
- Partner throws a combination → enters a double leg
- Defender strikes → opponent shoots underneath
- Fighter backs toward cage → opponent initiates clinch wrestling
This helps connect visual recognition and reaction timing to the defensive technique.
Wrestling Defense vs. MMA Defense
Pure wrestling provides much of the technical foundation, but MMA changes the context.
MMA introduces:
- Punches, kicks, knees, and elbows
- Smaller gloves
- A cage instead of wrestling boundaries
- Submission threats
- Different stance requirements
- Transitions between striking and grappling
A very low wrestling stance, for example, may expose a fighter differently to strikes. Conversely, standing too upright can make the hips easier to attack.
MMA defense requires balancing both problems.
Staying Composed Against Takedown Threats
An opponent doesn’t need to complete a takedown for wrestling threats to affect striking.
Repeated level-change feints can cause a fighter to:
- Drop the hands prematurely
- Shorten combinations
- Stop moving forward
- React to shots that aren’t actually coming
Training against realistic feints helps fighters distinguish between genuine entries and attempts to provoke a reaction.
The goal is not to ignore the takedown threat. It’s to respond without giving away unnecessary openings.
Style Matchups and Takedown Defense
Different opponents create different defensive problems.
Against a powerful double-leg wrestler, distance management and early hip defense may receive more attention.
Against a cage wrestler, underhooks, head position, grip fighting, and wall escapes become particularly important.
Against an opponent who frequently transitions between striking and takedowns, recognizing setups may matter as much as the physical defense itself.
Defensive preparation should reflect the attacks you’re likely to face.
Common Takedown Defense Mistakes in MMA
Watch for these recurring problems:
- Reacting late to level changes
- Reaching instead of moving the hips
- Giving away underhooks near the cage
- Trying to stand before breaking grips
- Remaining square after stopping a shot
- Depending on strength instead of position
- Treating the initial sprawl as a completed defense
- Practicing wrestling defense without strikes or cage scenarios
Correcting these habits makes the defensive system more complete.
Building a Complete Takedown Defense System
Takedown defense works in layers.
A fighter might first use distance and footwork to make the entry difficult. If the opponent reaches the legs, the sprawl becomes relevant. If the attacker continues wrestling, head position, underhooks, whizzers, grip fighting, and counter-wrestling take over. If the exchange reaches the cage, another set of positional skills becomes necessary.
That creates a defensive sequence:
Recognize the setup → defend the entry → establish control → stop follow-up attacks → improve position → disengage or counter.
Final Thoughts
A successful sprawl doesn’t necessarily end a takedown attempt. Good wrestlers chain attacks together, switching between doubles, singles, body locks, and cage pressure until they either finish the takedown or lose the position.
That makes MMA takedown defense a continuing positional battle rather than a single reaction.
Develop the initial sprawl, then build the skills that come after it: head control, underhooks, whizzers, grip fighting, cage movement, scrambling, and safe transitions back to striking. When those pieces work together, defending a shot becomes the beginning of your next decision rather than the end of the exchange.